This is how to install a google analytics pixel on a website.
What you will need:
• An existing website (this demo uses WordPress)
Install a Tag Manager
Option 1 – Paste Pixel Code From Google Tag Manager into Website
1. Open chosen WordPress website and in the navigation menu, click Navigation -> Astra Options -> Custom Layouts
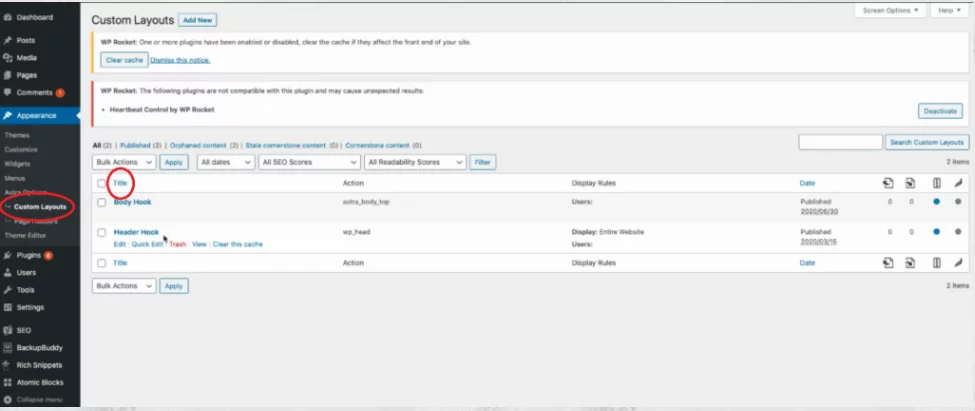
4. In centre of screen, click Title and name ‘Header Hook’ 5. Click a second Title and name ‘Body Hook’
6. Go to tag manager.google.com
7. Set up container if not already done so here
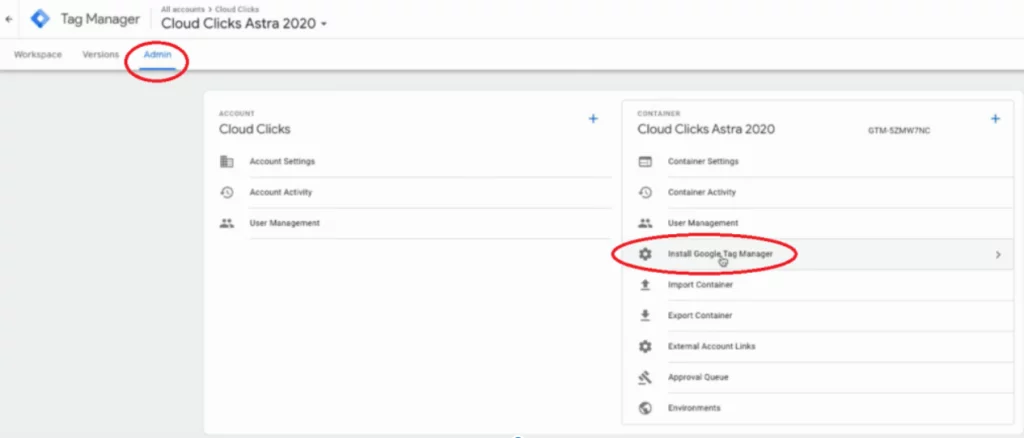
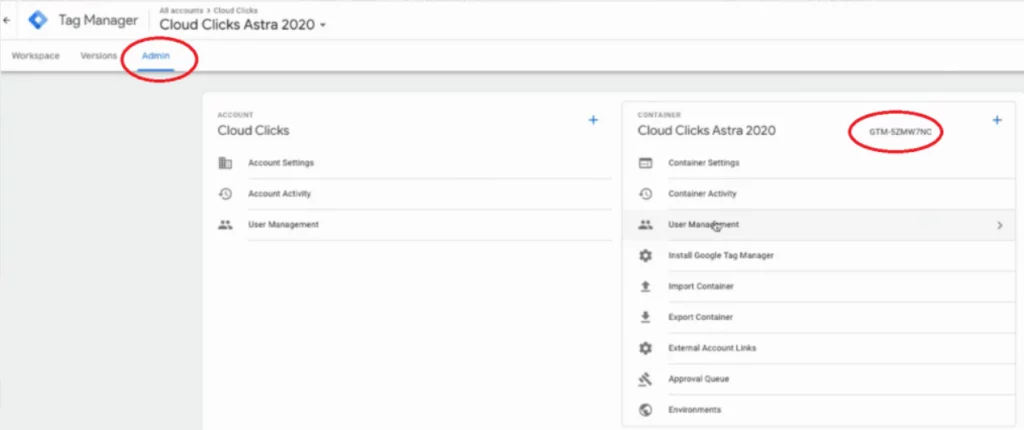
8. Go to admin tab -> install google tag manager
10. Copy header code (Ctrl + C), and paste (Ctrl + V) directly into header hook code box in WordPress
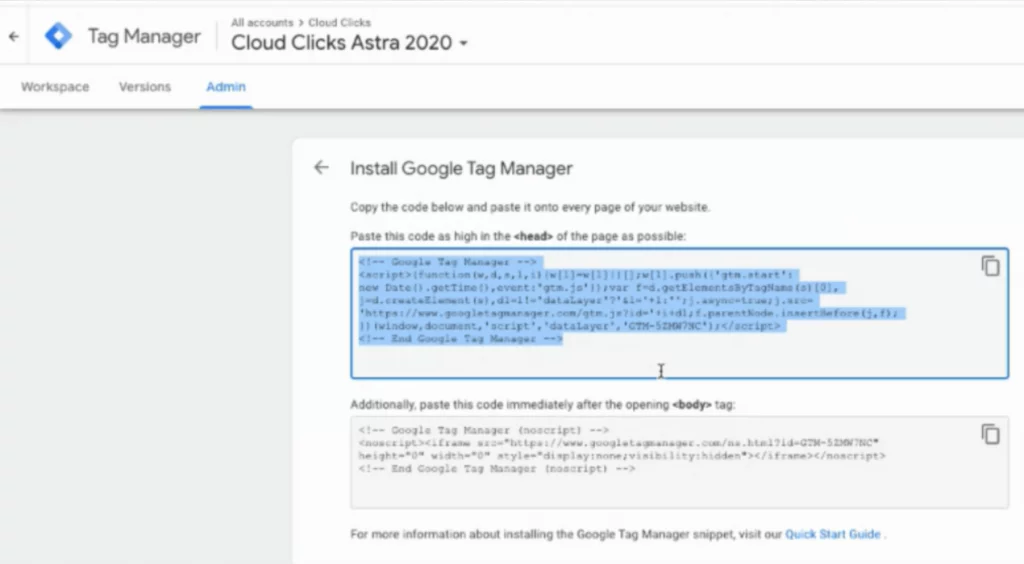
11. Copy body code (Ctrl + C), and paste (Ctrl + V) directly into body hook code box in WordPress
12. Finished
Option 2 – Install a Plugin
1. Open your WordPress website
2. In the navigation bar, click Plugins -> Add New
4. Type in ‘Tag Manager’ to search bar on right
5. Select Install Now on Google Tag Manager for WordPress

6. Follow the prompts…
7. Once Tag Manager opens, create a container for your business, and click admin along header
8. On the right of your container name, copy the GTM-[ ] code and paste in WordPress
9. Finished
How to install Google Analytics Pixel
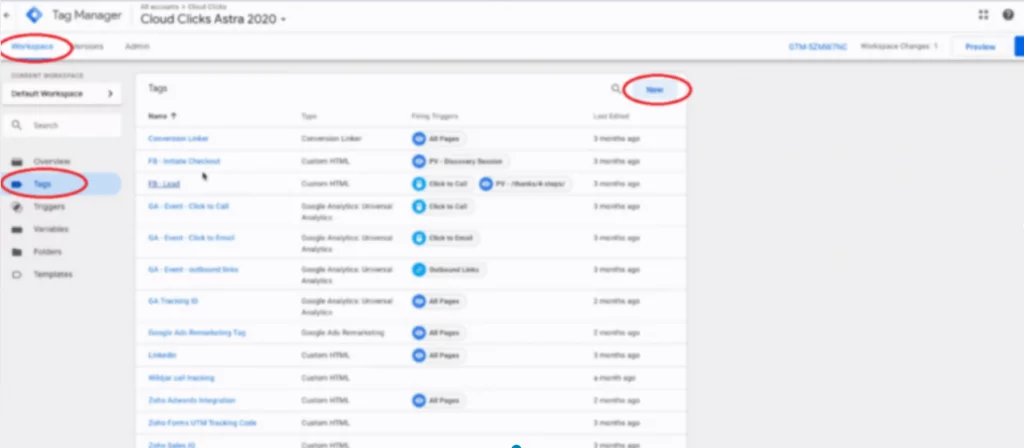
1. Go to Google Tags Manager, Workplace, and click Tags in the navigation menu
2. Click New and give it a name. Eg. ‘GA Tracking ID’
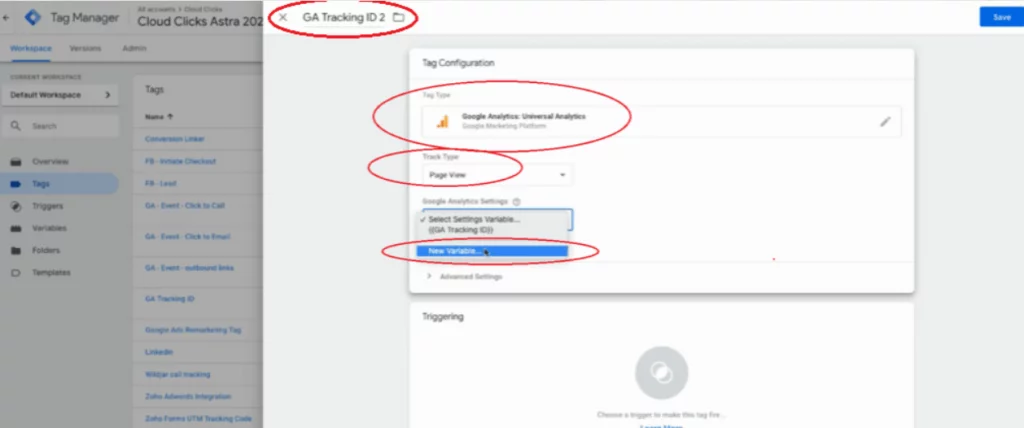
3. Click Tag Configuration and select Google Analytics: Universal Analytics
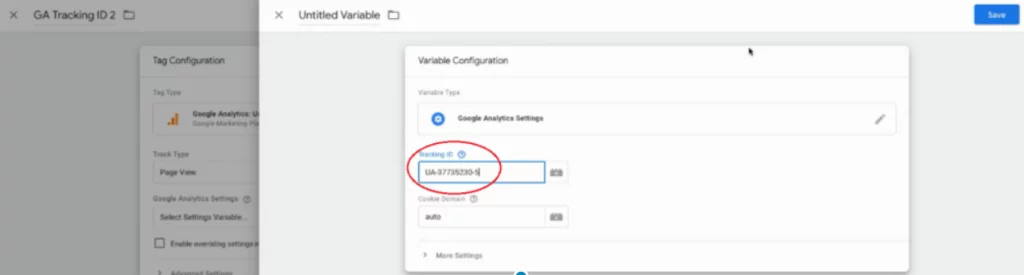
4. Click New Variable
5. Open Google Analytics and go to your Google Analytics property 6. Select Admin -> Tracking Info -> Tracking Code
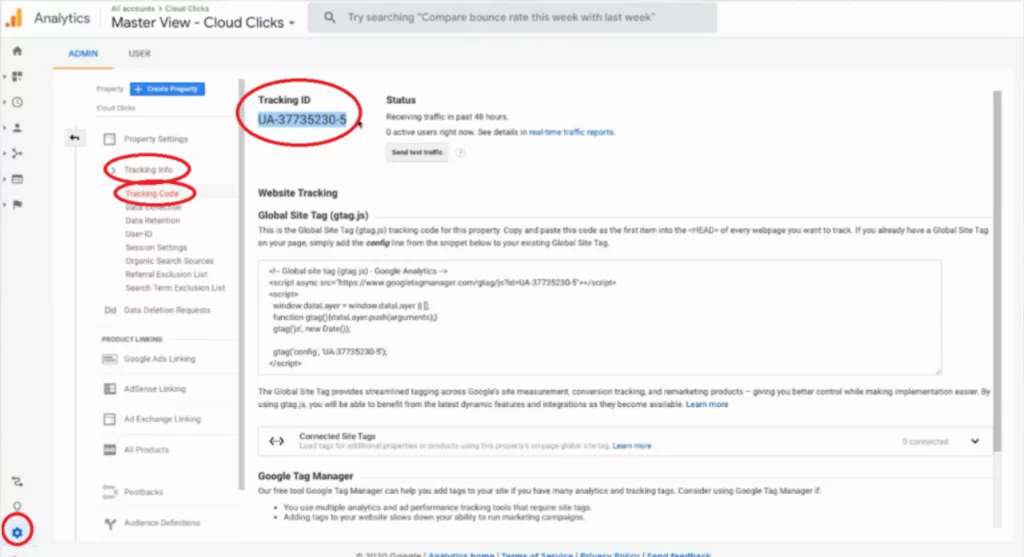
7. Copy the Tracking ID from the top left and paste in your tag manager box in Google Tag Manager tab
8. Click Triggering box and select All Pages
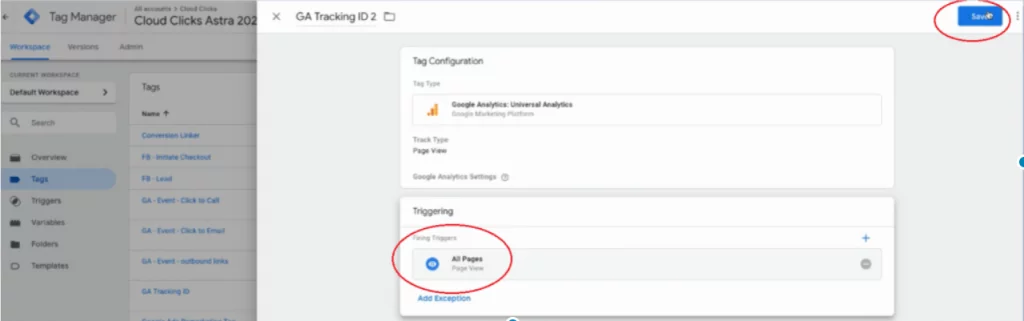
9. Click Save
How to Install Facebook Pixel
Option 1 – Use a Partner
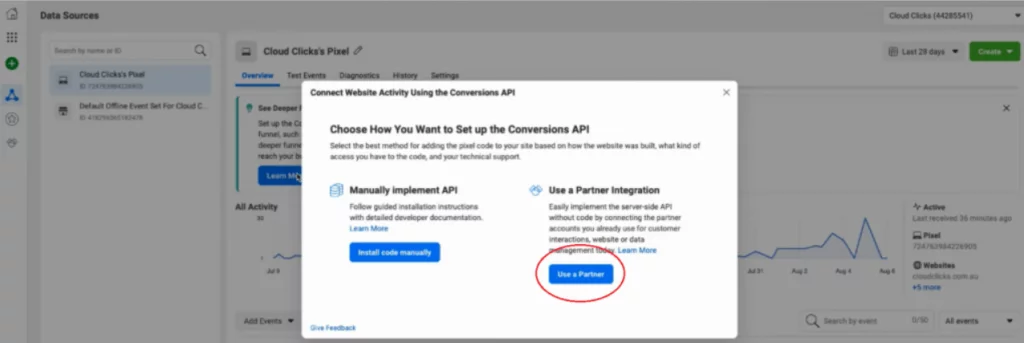
1. Open your Facebook Business Manager
2. Open Event Manager
3. Click Add Events -> From a New Website -> Use a Partner
4. Select Google Tag Manager
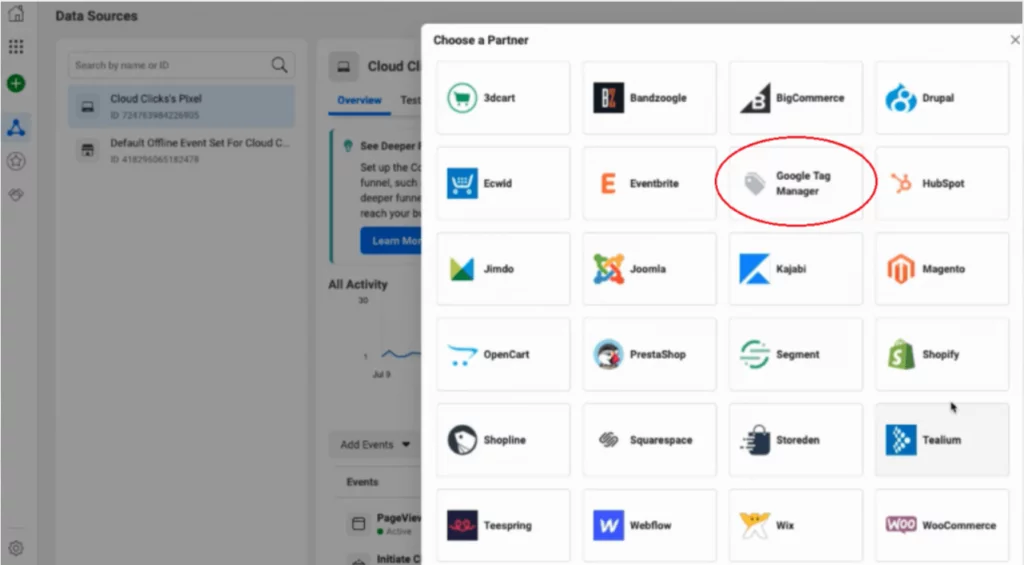
5. Follow the prompts…
6. Finished
Option 2 – Install Code Manually
1. Open your Facebook Business Manager
2. Open Event Manager
3. Click Add Events -> From a New Website -> Install Code Manually
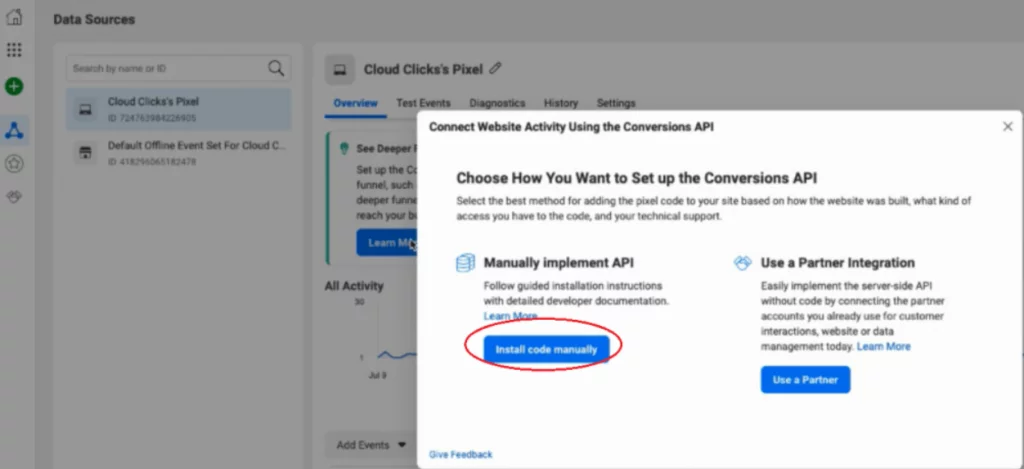
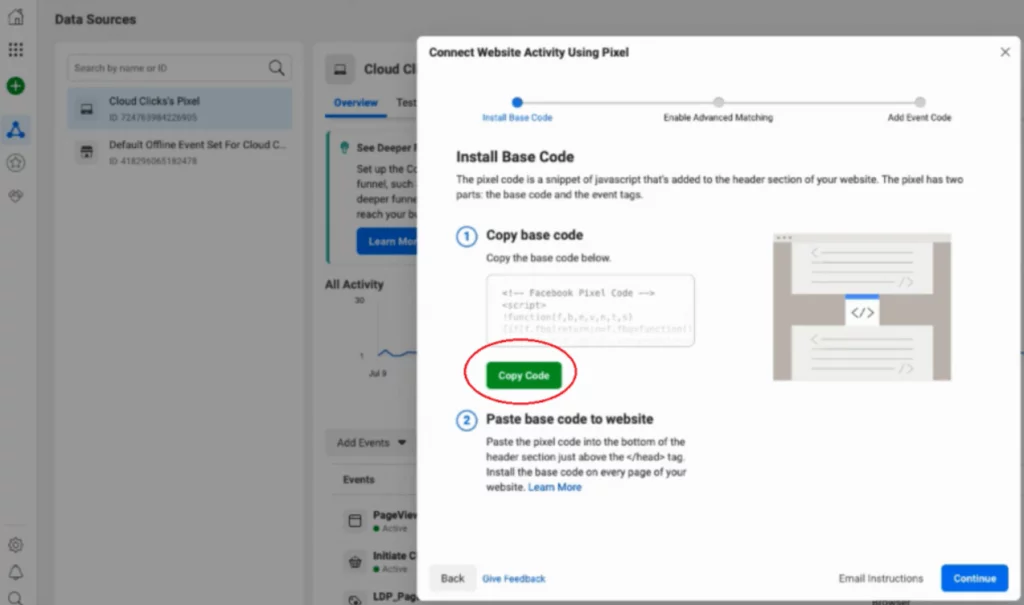
4. *Copy Code*
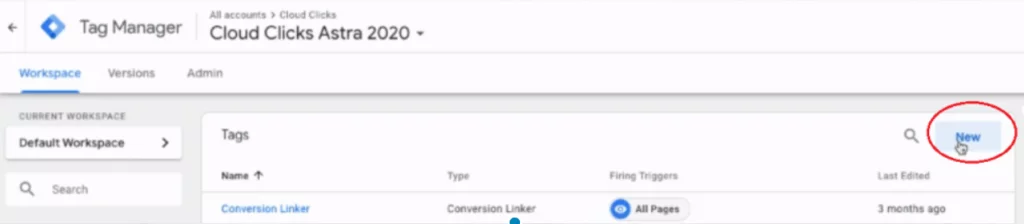
5. Go to your Tag Manager tab -> Tags -> New
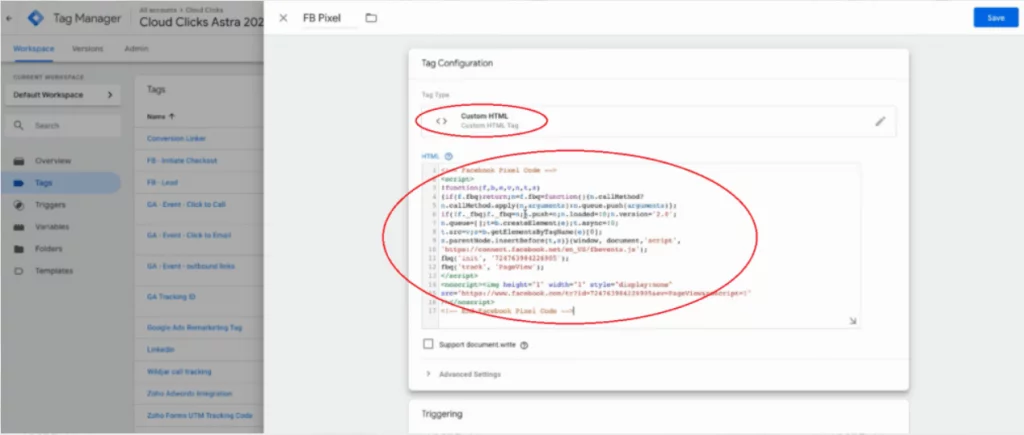
6. Name ‘FB Pixel’
7. Click Tag Configuration -> Custom HTML Code 8. *Paste*
9. Click Triggering -> All pages -> Save
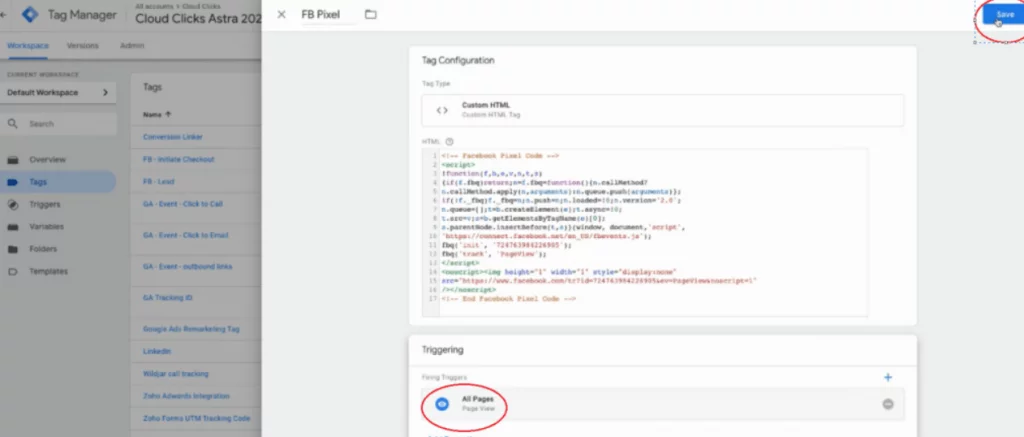
10. Finished
How to Create a Custom Audience for Retargeting
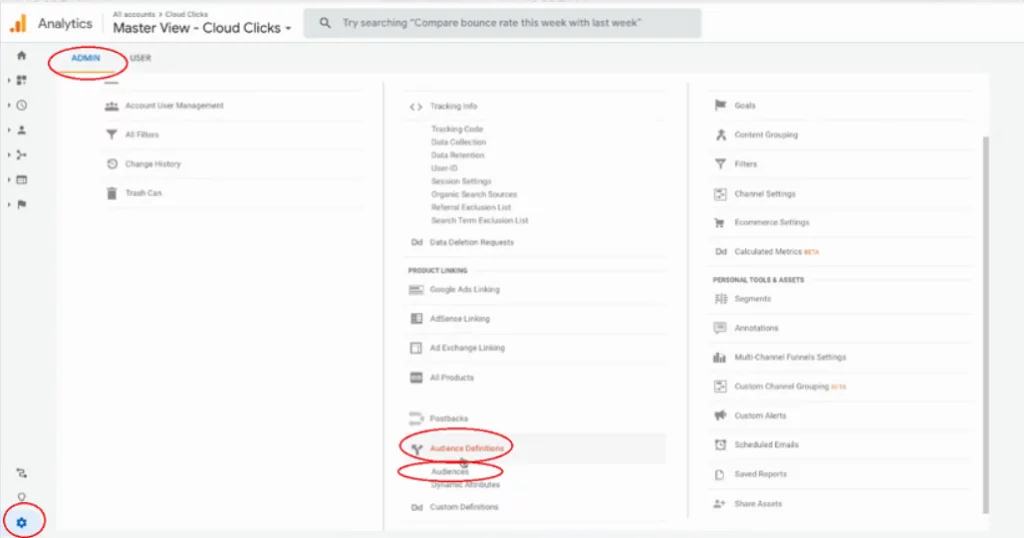
1. Go to your Google Analytics property in the analytics website and select Admin -> Audience Definitions -> Audiences
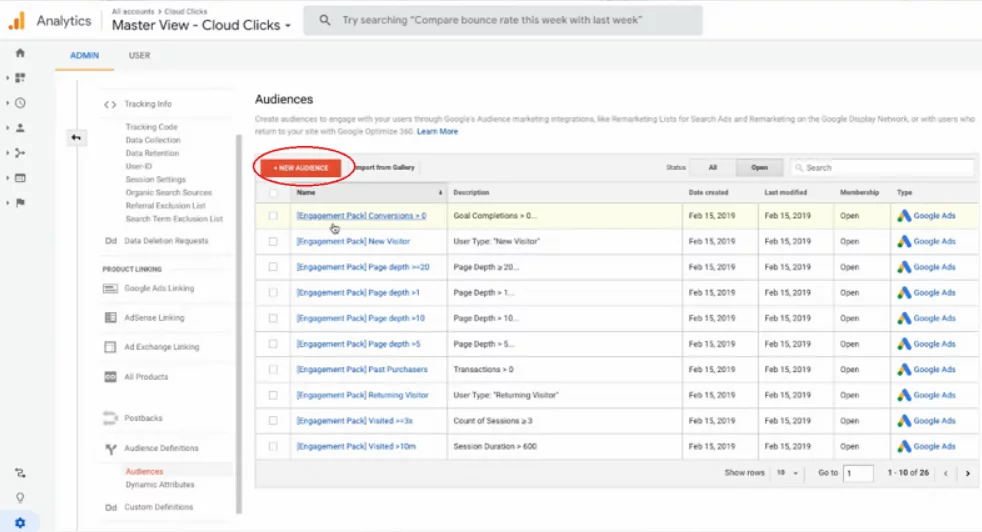
2. Click New Audience
3. -> Audience source -> Edit -> follows prompts to link your Google Ads Account

4. Click Audience definition and select All Users
5. Set Membership Duration as 365
6. Give it an Audience name. Eg All Users 365D

7. Click Add Destination and select your Google Ads Account which will have a location assigned to it when it was set up previously.
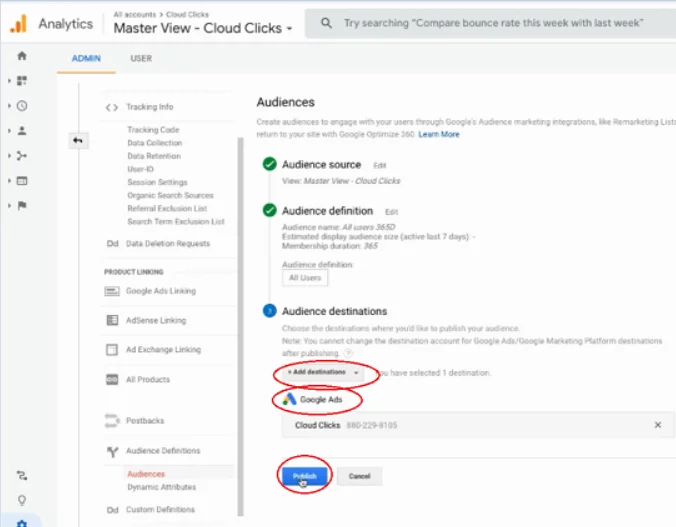
8. Click Publish
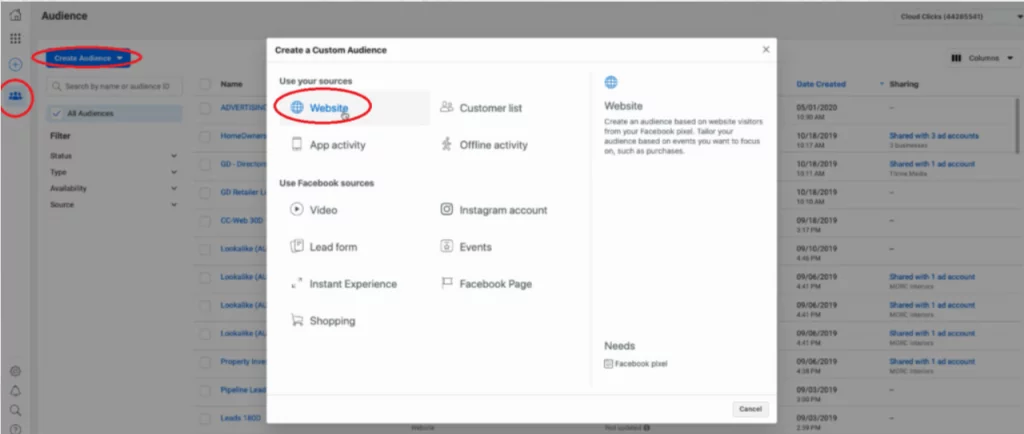
9. Head to Facebook Business Manager. In the navigation menu, click Audiences -> Create Audience -> Custom Audience -> website
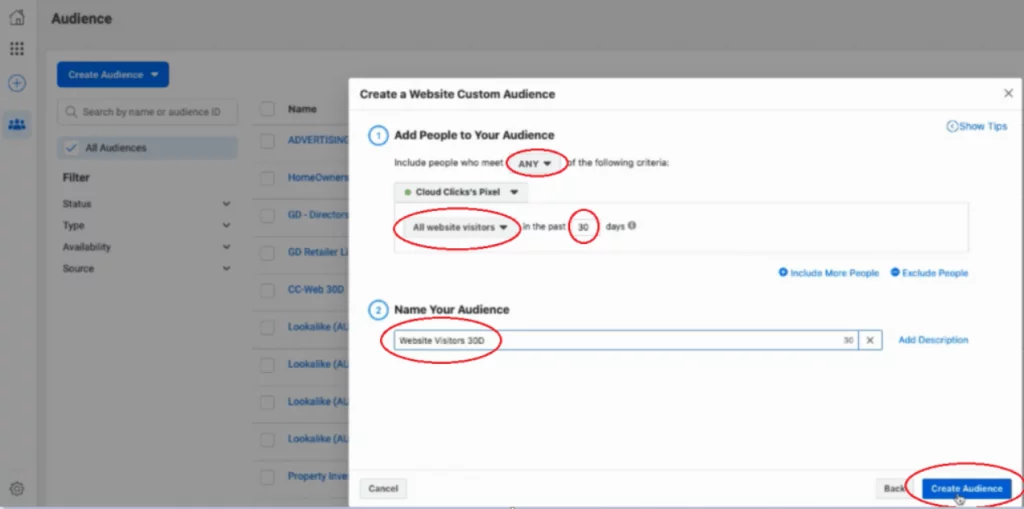
10. Set options to ‘Any’, ‘All website visitors’, and ’30’
11. Name ‘Website Visitors 30D’ and click Create Audiences
12. Finished
Congratulations! You now know how to install a google analytics pixel on a website!